Goosebumps Say Cheese and Die and Die Again
Say Cheese and Die — Once more! is the forty-fourth book in the original Goosebumps book serial, a sequel to Say Cheese and Dice!, and the 2d volume in the Say Cheese and Die! saga. It was first published in 1996.
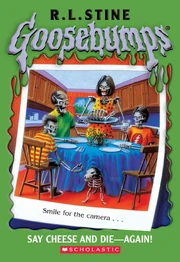
The cover illustration depicts a photograph of a skeleton family unit having dinner.
Contents
- 1 Blurb
- 2 Plot
- 3 Reprints and rereleases
- 3.1 Differences
- 4 International releases
- four.1 Differences
- 5 Trade
- 6 Television adaptation
- seven Advertising
- 8 Artwork
- nine Tear-outs
- 10 Trivia
- x.1 References in other Goosebumps media
Blurb
PICTURE-PERFECT NIGHTMARE!
Sourball. That'south what Greg calls his English language teacher, Mr. Saur. He's a real grouch. And now he just gave Greg a big fatty "F" on his oral report. He didn't believe Greg'southward story. Well-nigh the camera Greg found last summertime. About the pictures information technology took. About the evil things that happened. Poor Greg. He just wanted to prove erstwhile Sourball wrong. But now that he's dug up the camera, bad things are happening. Actually bad things. Only like the first fourth dimension...
Plot
In the modest town of Pitts Landing, Greg Banks is in his English form and is chosen upon by his English teacher, Mr. Saur, to requite a study about what he did during the summer. Mr. Saur is a strict teacher who never laughs and is referred to every bit "Sour Ball" past Greg and his friends. Greg describes what happened to him last summer with the evil camera, just Mr. Saur believes the story is false and gives Greg an "F" on the assignment. Greg insists his story is true, so Mr. Saur challenges Greg to present the photographic camera. Greg's parents won't let him visit his cousins in the summer if he flunks his report, so he's drastic to prove his story'southward validity.
Greg then plans to revisit the Coffman Firm to retrieve the camera. He discusses this over lunch with his friends, Doug, Michael and Shari, who are shocked at his decision and try to discourage him, equally the camera had done and then many bad things to them last summer. Just when Greg'southward English classmates named Donny and Brian, mock him in public by pretending to take photographs with their hands and quipping "Say cheese and die!", Greg becomes all the more determined to find the camera and prove his story is truthful.
Later that night, Greg returns to the Coffman House, only to observe that it has been purchased by a new owner who has had the place cleared out. While Greg is searching for the camera in the debris, a male child named Jonathan catches him, taking him for a thief. He before long realizes that this is not the case. Greg learns that Jonathan is the son of the new owner of the Coffman house. Greg finally finds the photographic camera under a raccoon's dead body/corpse, and Jonathan becomes curious as to why he is so interested in information technology. Greg says that he must testify it to his English course, simply Jonathan becomes interested in keeping the camera, arguing that it is technically his since it was originally in his new house.
While fighting for the photographic camera, Greg accidentally snaps Jon'due south picture. The photograph then shows a long carpenter smash going through Jon's human foot. Jon thinks that the camera is a joke and Greg asks if he tin can borrow it for a while. Jonathan then runs off to find his father, only to step on a carpenter blast, equally predicted in the photograph, and then is rushed to the infirmary afterwards that. The next day, Greg goes to school and is caught by Shari on the mode. Greg tries to hibernate the camera from Shari unsuccessfully. They take an argument about Greg bringing the photographic camera to school which results in Greg accidentally snapping a motion-picture show of Shari. The picture show then develops and appears to be a negative, leading the two to believe that the camera is broken. Shari then grabs the camera and takes a moving-picture show of Greg, which then develops into a picture show of Greg actualization to wait like an obese person.
Greg then goes to English class, excited to bear witness Mr. Saur his photographic camera equally proof for his consignment, only to exist disappointed when he discovers that Saur is out for the solar day, with a substitute in his place. He and then decides to put the camera in his locker but is caught past Donny and Brian afterward exiting the classroom. They torment him with the camera but are stopped by the principal. The side by side morn, Greg wakes upwardly to find himself fatter in his pajamas. His female parent disagrees, proverb that his pajamas are always too tight for him. Greg finds out in school that Shari has lost weight. Over the following days, Shari loses more than weight while Greg gains more.
Mr. Saur arrives the following day and Greg shows him the camera which he ignores. He then makes his terminal decision, which is to give Greg a declining marker. Greg's parents insist that his weight gain is the consequence of some allergic reaction to something he ate. Shari and Greg, drastic for a solution, realize that if they make Greg's photo negative, there might be a run a risk of returning to their normal bodies. They rush to a photo shop where Greg'southward brother Terry works. They observe him and plead with him to contrary their pictures. Greg offers him all of his assart, which his brother accepts. His blood brother then reverses the pictures and the following day, Greg and Shari render to their normal bodies.
Against Shari'due south advice, Greg brings the photographic camera to schoolhouse and once more insists to Mr. Saur to give him a passing marker for his assignment, offering to demonstrate the camera's powers. Mr. Saur takes the photographic camera and insists on taking a picture of Greg with his unabridged course. He then snaps photograph. He asks Greg what is going to happen and Greg says they'll run across.
Reprints and rereleases
| Book | Release date | Blazon | Media |
|---|---|---|---|
| 2003 - 2007 reprint series | March 2004 | Standalone | Paperback |
Differences
- The tagline was changed to "Smile for the photographic camera..."
International releases
| Gallery | |
|---|---|
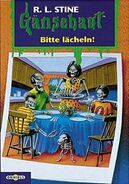
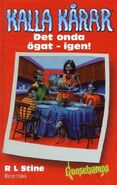
| Great britain Italian (Foto Dal Futuro Vol. 2 - Photos From The Futurity No. 2) Spanish (La Otra Sonrisa de la Muerte - The Other Photos Of Death) German (Bitte Lächeln Please Smiling!) Danish (Smil, du er Død Smile, Yous're Expressionless!) Swedish (Det Onda Ögat - Igen! - The Evil Heart - Again!) French (Ver. one) (Photos De Malheur Pictures Of Misfortune) French (Ver. 2) (Photos De Malheur Pictures Of Misfortune) French (Ver. 3) (Photos De Malheur Pictures Of Misfortune) Brazilian (Sorria East Morra... Outra Vez! - Smile and Die... Once again!) Hebrew Mexican (Sonrie Y Muerte... Otra Vez! - Smiling and Decease... Again!) (Reprint) Italian (Scatti Mortali - Deadly Shots) (Compilation with Say Cheese and Die! and The Cuckoo Clock of Doom) | |
")
")
")
")
")
")
")
")
")
")
")
Differences
- In the French Canadian release, this is the twoscore-fifth book in the original serial.
- In France, this is the 30-showtime book in the original serial.
- Greg Banks is chosen "Alex Banks."
- Doug Arthur is called "Arthur Normann" and is nicknamed "Ouiseau," the French discussion for "Bird."
- Shari Walker is called "Sara Walker."
Merchandise
- Most of the 90s merch for Say Cheese and Die - Once again! removed the word "Die", with the championship beingness written as "Say Cheese And... Again!". This was mostly the case for apparel.
")
100 slice jigsaw puzzle.
")
Sweatshirt.
")
Sweatshirt.
")
T-shirt.
")
T-shirt (front and dorsum).
")
T-shirt detail.
")
Sweatshirt.
")
Long-sleeve T-shirt.
Television accommodation
Say Cheese and Die — Again! was adapted into an episode of the Goosebumps Idiot box series. It is the eighteenth episode of season three, and the 6th-2nd episode overall.
")
Advertizement
")
Artwork
")
Tear-outs
The original printings of the volume included bookmark and trading bill of fare tear-outs.
")
#44 trading card (front and back).
")
#44 bookmark (front and dorsum).
Trivia
- Say Cheese and Die — Again! has the longest time difference between installments of any sequel in the original series at three years & 7 months, as well as by xl books.
- Dissimilar the previous book, Say Cheese and Die!, which was told in the third person narrative, Say Cheese and Die — Once again! is told from Greg'southward bespeak of view.
- It is never revealed what happened to the two bullies, Joey Ferris and Mickey Ward, who constitute the camera and used it at the end of the previous book.
- Both this volume and the originalSay Cheese and Die! end on the same twist catastrophe of characters waiting to come across the photo the camera created.
- This is the final volume in the Say Cheese and Dice saga to be set in Pitts Landing.
- The place where Terry works at after he loses his former task is chosen Kramer'southward Photo Mart which is possible a reference to the Kramer family from Night of the Living Dummy II.
- Greg claims the events of the commencement book happened terminal summer, even though it actually took place in the fall.
- One of the skeleton kids on the cover is wearing a shirt with a design closely resembling the logo for The Grateful Expressionless.
- The 2018 eBook removes any mention of Greg referring to Donny and Brian as "Sumo-i and Sumo-ii".
- Brian is descried as a big child instead of a big "gorilla of a kid"
- "He never kids around" is inverse to "He never jokes around".
- References to a chalk board are removed
- Two uses of "crazy" are removed.
- The initial description of Greg's photo of him fat is toned down, removing diverse specific details and comparisons to a balloon. Things similar this are inverse throughout the volume, and fatter is replaced with "bigger" in various places, and mentions of diets, chins, flab, etc. are removed.
- Greg's mom suggesting she give him skim milk is changed to her suggesting he go bigger pajamas.
- Shari saying she is losing weight is changed to her saying she is shrinking. "Skinny" is changed to "narrow" in one place.
- A line about how the girl's in schoolhouse have crushes on the principal is removed.
- This is the final book to use "Coming Soon/Also Available From R.L. Stine" on the advertisement for the adjacent book on the dorsum cover.
- This book references Jell-O and the Honda Civic.
- The 2018 eBook removes the Clot-o mention, equally it is used as a way to describe Greg'south weight.
- In the original embrace concept art, the skeleton family unit do not have eyeballs. Too, similar to the first cover, the art features a young girl skeleton, including the colour mockup.[1]
- Coincidentally, with the addition of a young female person skeleton, the scene on the embrace resembles the events of Amanda Benson'south nightmare in Welcome to Dead House.
References in other Goosebumps media
- The photographic camera appears in Goosebumps: The Game. There is as well an in-game accomplishment named "Say Cheese--Over again!", which tin can be earned past taking pictures of all the monsters with the haunted camera.
| Goosebumps series | ||
| #01 Welcome to Dead House | #22 Ghost Beach | #43 The Beast from the E |
| #02 Stay Out of the Basement | #23 Render of the Mummy | #44 Say Cheese and Die — Once again! |
| #03 Monster Blood | #24 Phantom of the Auditorium | #45 Ghost Camp |
| #04 Say Cheese and Die! | #25 Attack of the Mutant | #46 How to Kill a Monster |
| #05 The Curse of the Mummy's Tomb | #26 My Hairiest Adventure | #47 Legend of the Lost Legend |
| #06 Let's Become Invisible! | #27 A Night in Terror Tower | #48 Assault of the Jack-O'-Lanterns |
| #07 Dark of the Living Dummy | #28 The Cuckoo Clock of Doom | #49 Vampire Jiff |
| #08 The Girl Who Cried Monster | #29 Monster Blood III | #50 Calling All Creeps! |
| #09 Welcome to Army camp Nightmare | #30 It Came from Beneath the Sink! | #51 Beware, the Snowman |
| #ten The Ghost Adjacent Door | #31 Night of the Living Dummy II | #52 How I Learned to Fly |
| #11 The Haunted Mask | #32 The Barking Ghost | #53 Chicken Chicken |
| #12 Exist Conscientious What You lot Wish For... | #33 The Horror at Camp Jellyjam | #54 Don't Become to Sleep! |
| #13 Piano Lessons Can Exist Murder | #34 Revenge of the Lawn Gnomes | #55 The Blob That Ate Everyone |
| #14 The Werewolf of Fever Swamp | #35 A Shocker on Daze Street | #56 The Curse of Camp Common cold Lake |
| #fifteen You Tin can't Scare Me! | #36 The Haunted Mask Two | #57 My All-time Friend Is Invisible |
| #16 One Day at HorrorLand | #37 The Headless Ghost | #58 Deep Trouble II |
| #17 Why I'm Afraid of Bees | #38 The Beastly Snowman of Pasadena | #59 The Haunted School |
| #18 Monster Blood Ii | #39 How I Got My Shrunken Head | #60 Werewolf Pare |
| #19 Deep Trouble | #40 Night of the Living Dummy III | #61 I Alive in Your Basement! |
| #20 The Scarecrow Walks at Midnight | #41 Bad Hare 24-hour interval | #62 Monster Blood IV |
| #21 Become Eat Worms! | #42 Egg Monsters from Mars | |
- ↑ The Fine art of Goosebumps Page 102
Source: https://goosebumps.fandom.com/wiki/Say_Cheese_and_Die_%E2%80%94_Again!
0 Response to "Goosebumps Say Cheese and Die and Die Again"
Post a Comment